Service Principal Configuration and Access Control
Service Principal Configuration
This section provides details about the options that need to be configured to enable Single Sign-On (SSO) for the App Service. It also covers the permissions required for reading data from Log Analytics.
- Step 1: Log in to Azure Portal and Open "Microsoft Entra ID".
-
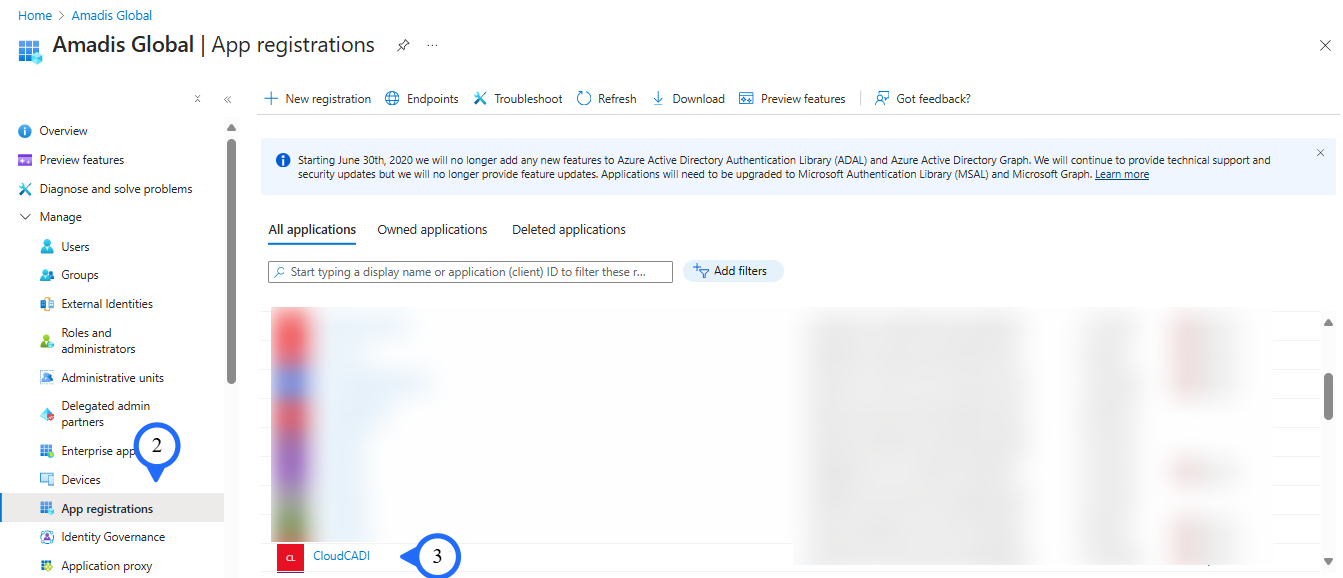
Step 2: Extend Manage section and Click on “App registrations”
-
Step 3: Select the “Service Principal” chosen during the Managed App creation.
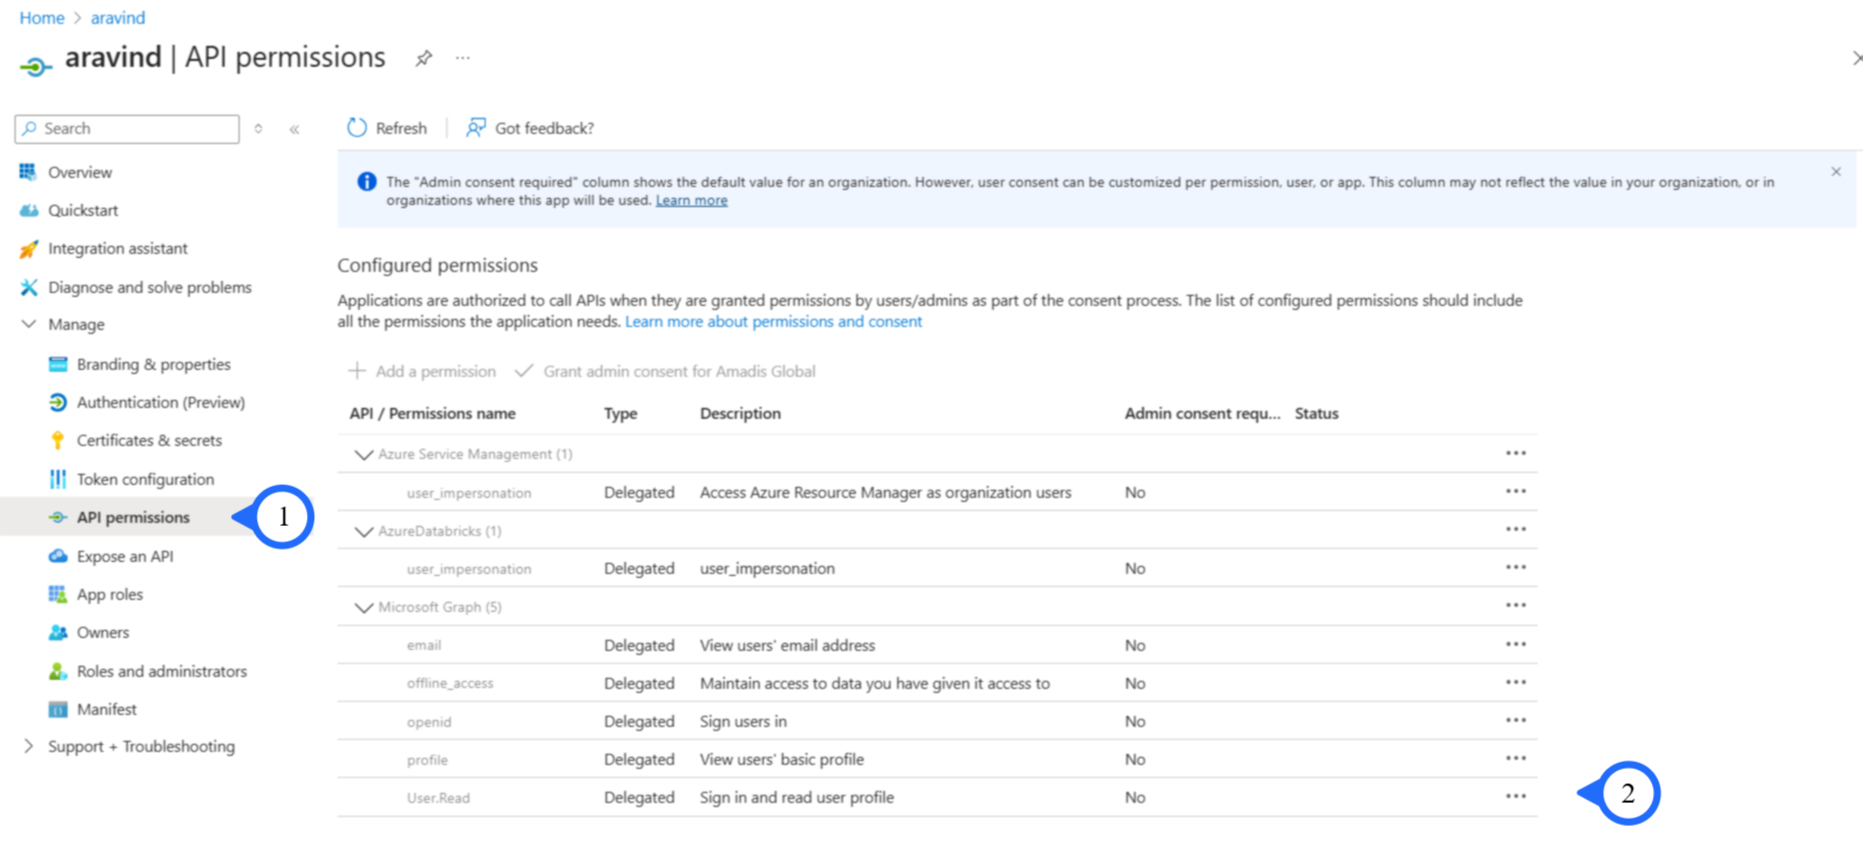
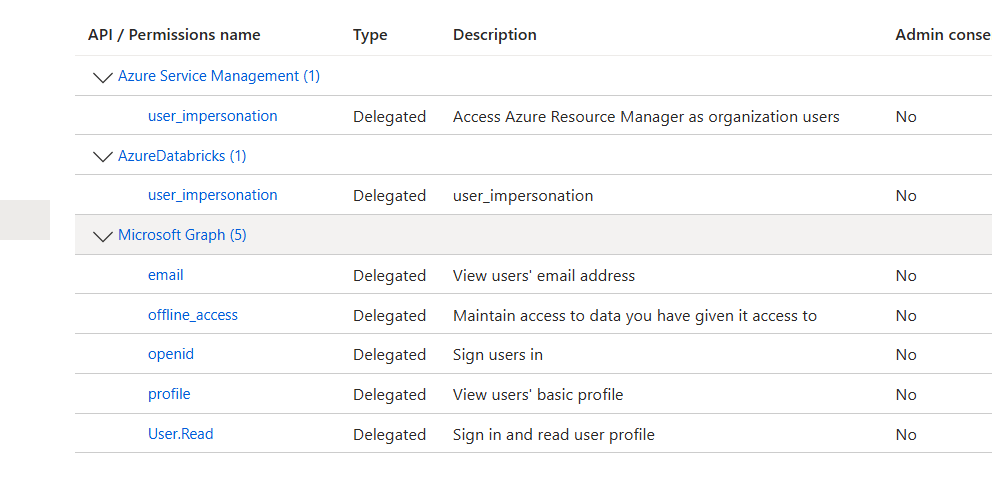
- Step 1: CLick On : “API Permissions”.
- Step 1: Select : “Following permissions”.
Setting up Authentication for the CloudCADI App service
-
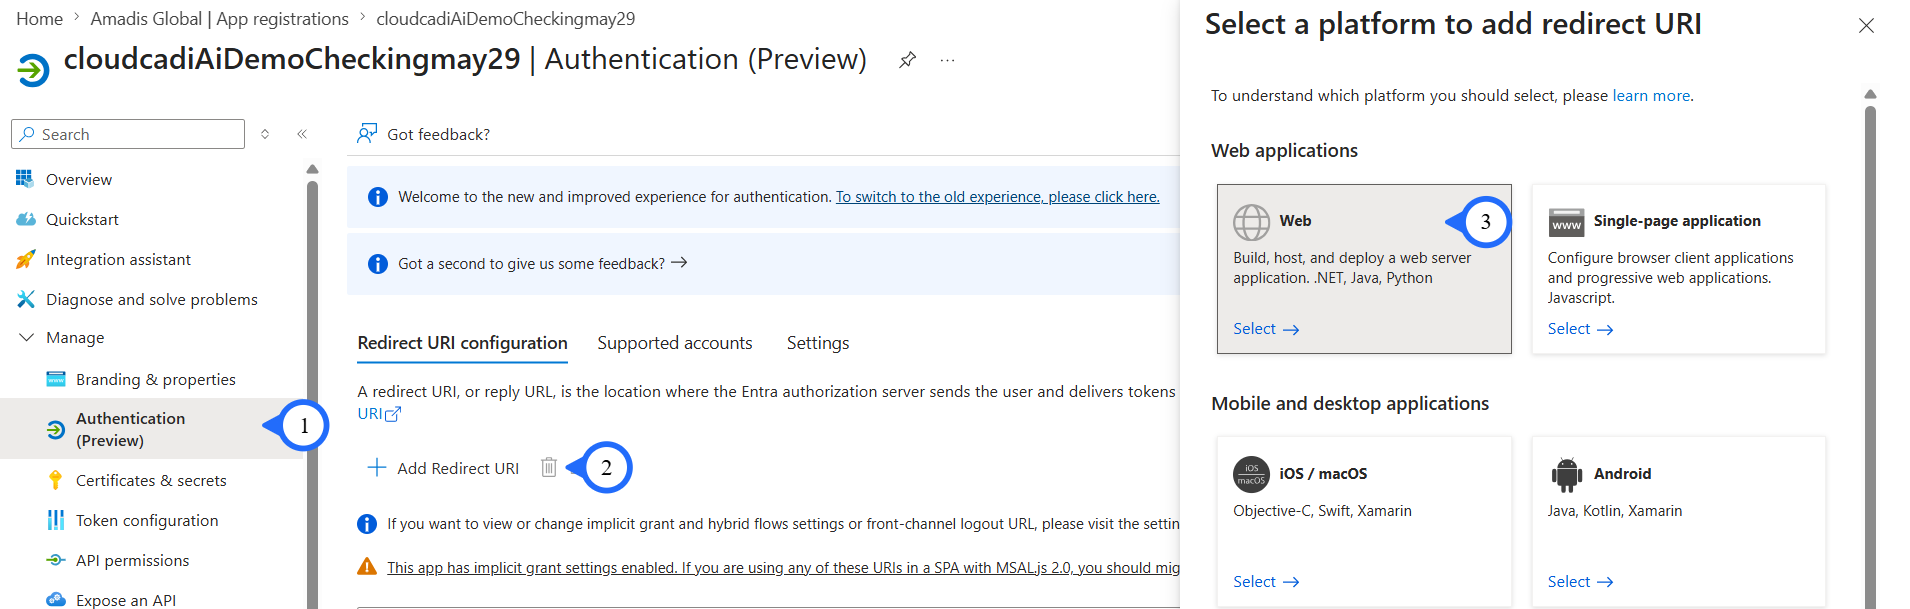
Step 1: From the Managed Section, Click on the "Authentication" Tab.
-
Step 2: In the right panel click on "Add Redirect URI"
-
Step 3: Select "Web" from the Popup window.
-
Step 4: In Configure Web Plane,
-
Enter Redirect URI:
https:// <App service URL> /api/v3/azure/auth/callback -
Enter Front-channel logout URL:
https:// <App service URL> /login -
Step 5: In the Implicit grant and hybrid flow,
-
Enable 'Access Token'
-
Enable 'Id Token'
-
Step 6: Click "Configure" Button.
Generate Client Secret
-
In the left-hand menu of your App Registration, under Manage section, select Certificates & secrets.
-
Click on the + New client secret button.
-
Description: Enter desciption(e.g., CloudCADI_App_Secret).
-
Expires: Select the recommended duration (e.g., 180 days).
Click Add at the bottom.
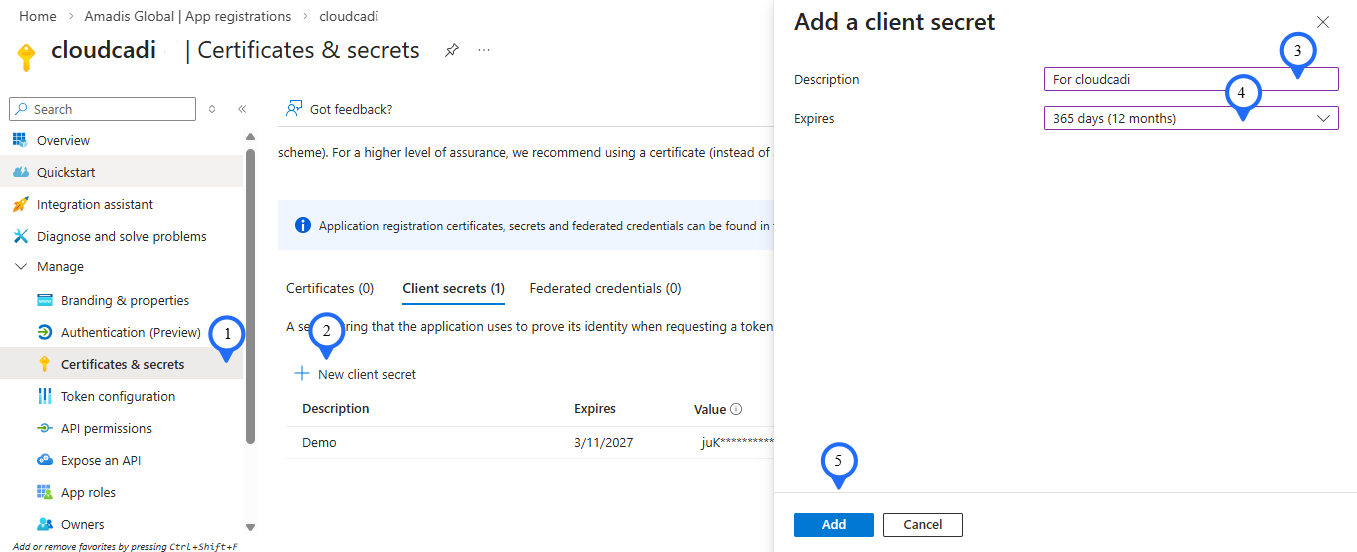
Note
Copy the client secret value and store it securely. Once you close the page, you won’t be able to retrieve it again.
Setting Microsoft Entra Id(Azure AD) Single Sign-On (SSO):
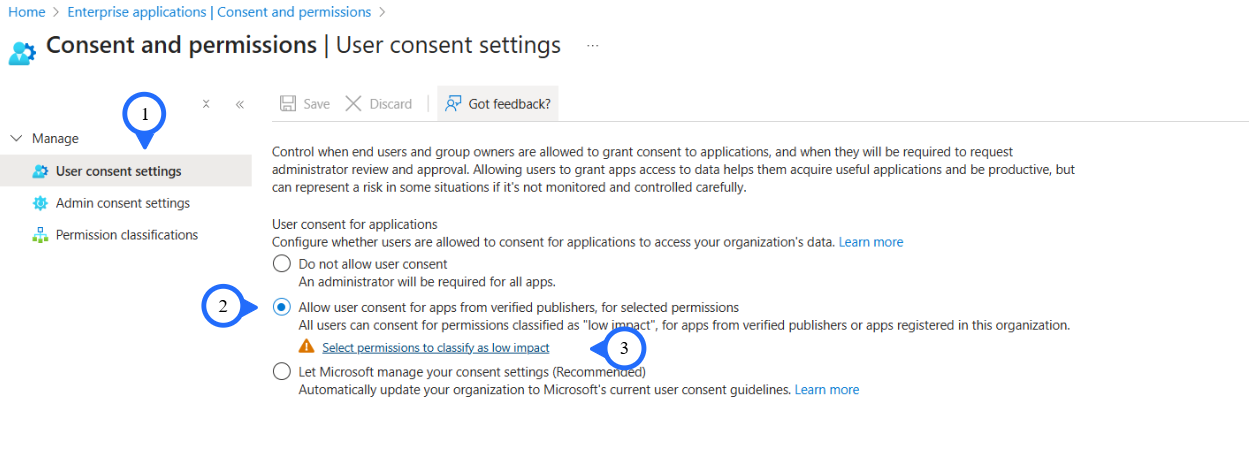
Prerequisites : - Allow user consent for apps from verified publishers, for selected permissions in the consent and permissions tab of Enterprise Applications.
- Step 1: Click on : "User Consent settings".
- Step 2: Click On : "Allow User Consent for apps from verified publishers".
- Step 3: Click On : "Select Permissions to classify Low impact".
- Select The Following Permissions

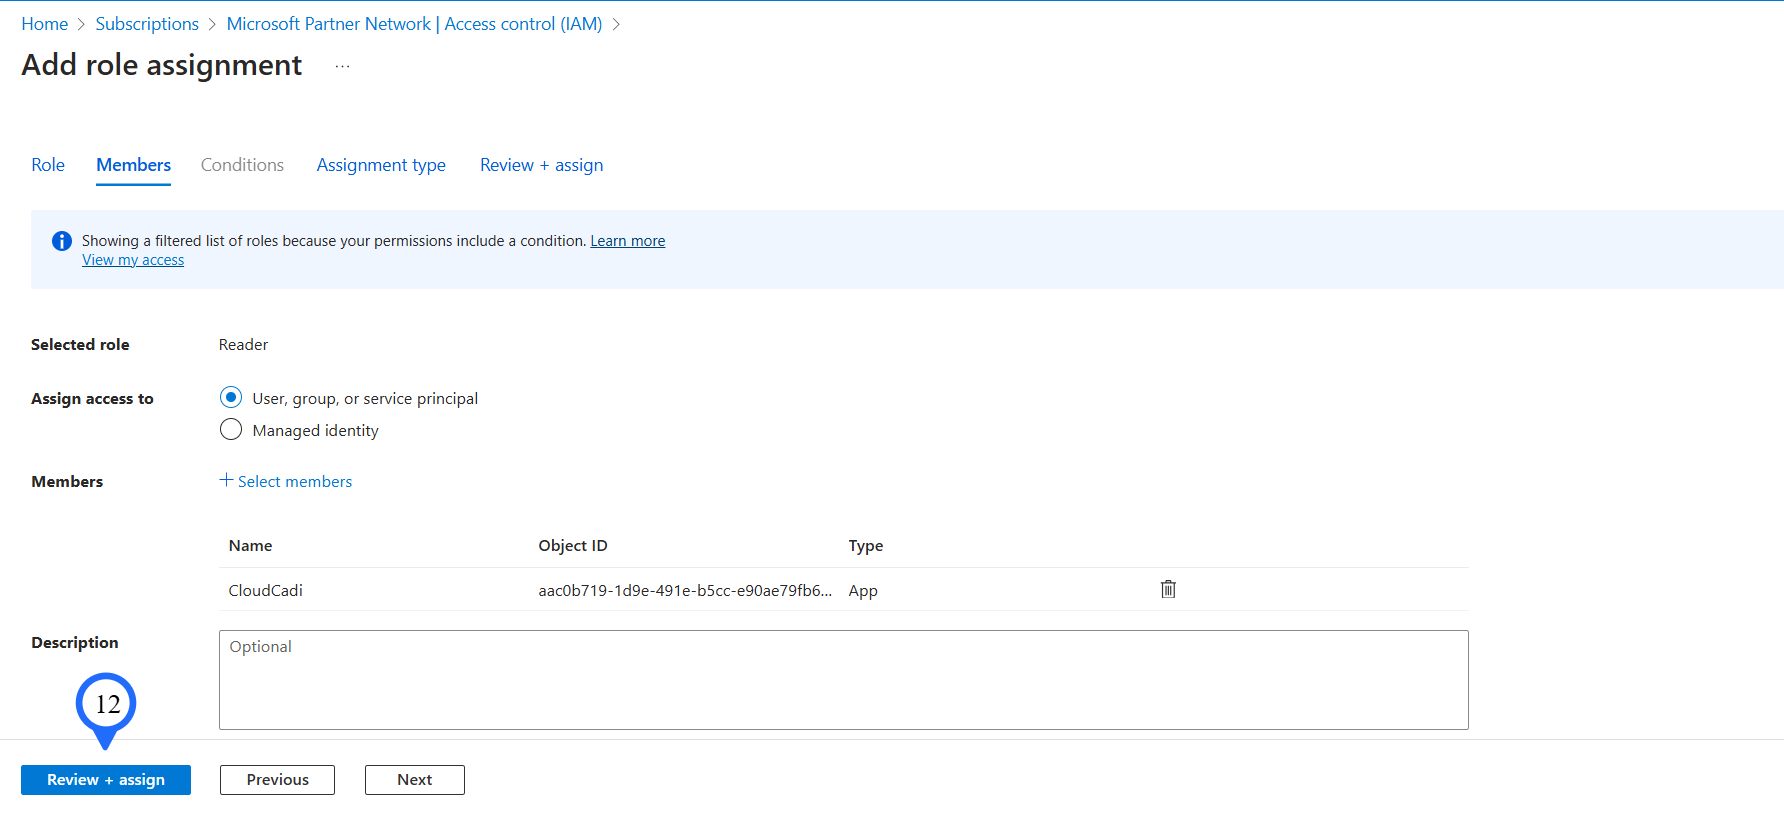
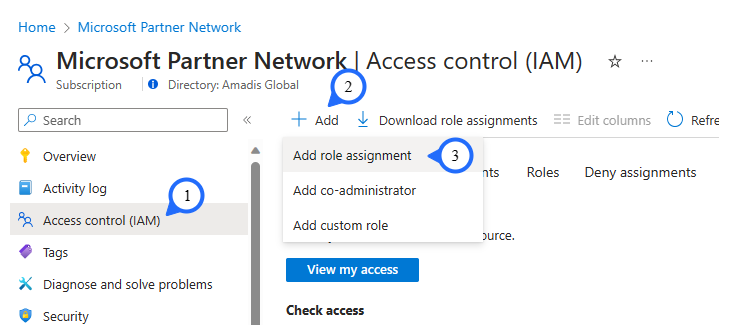
Setting up Subscription level Reader Role
-
Step 1: Open "Subscription" from the 'azure portal' Select the "Access Control (IAM)" from the left side panel.
-
Step 2: Click on "+Add" at the top.
-
Step 3: Select "Add Role Assignment".
-
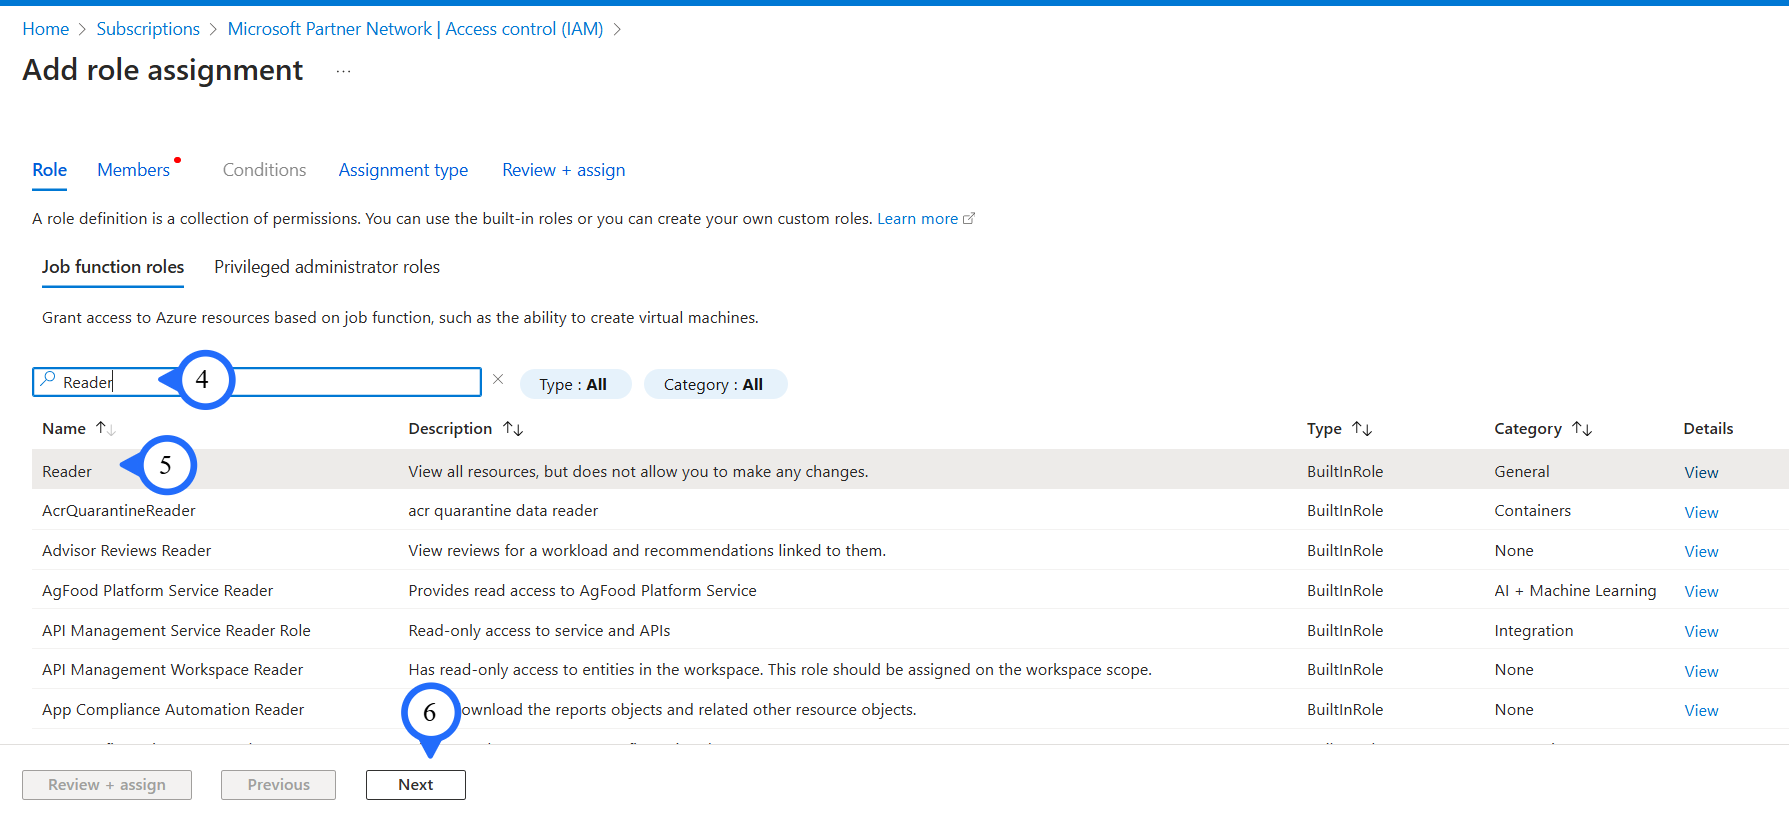
Step 4 & 5: Search and select "Reader".
-
Step 6: Click on "Next" button.
-
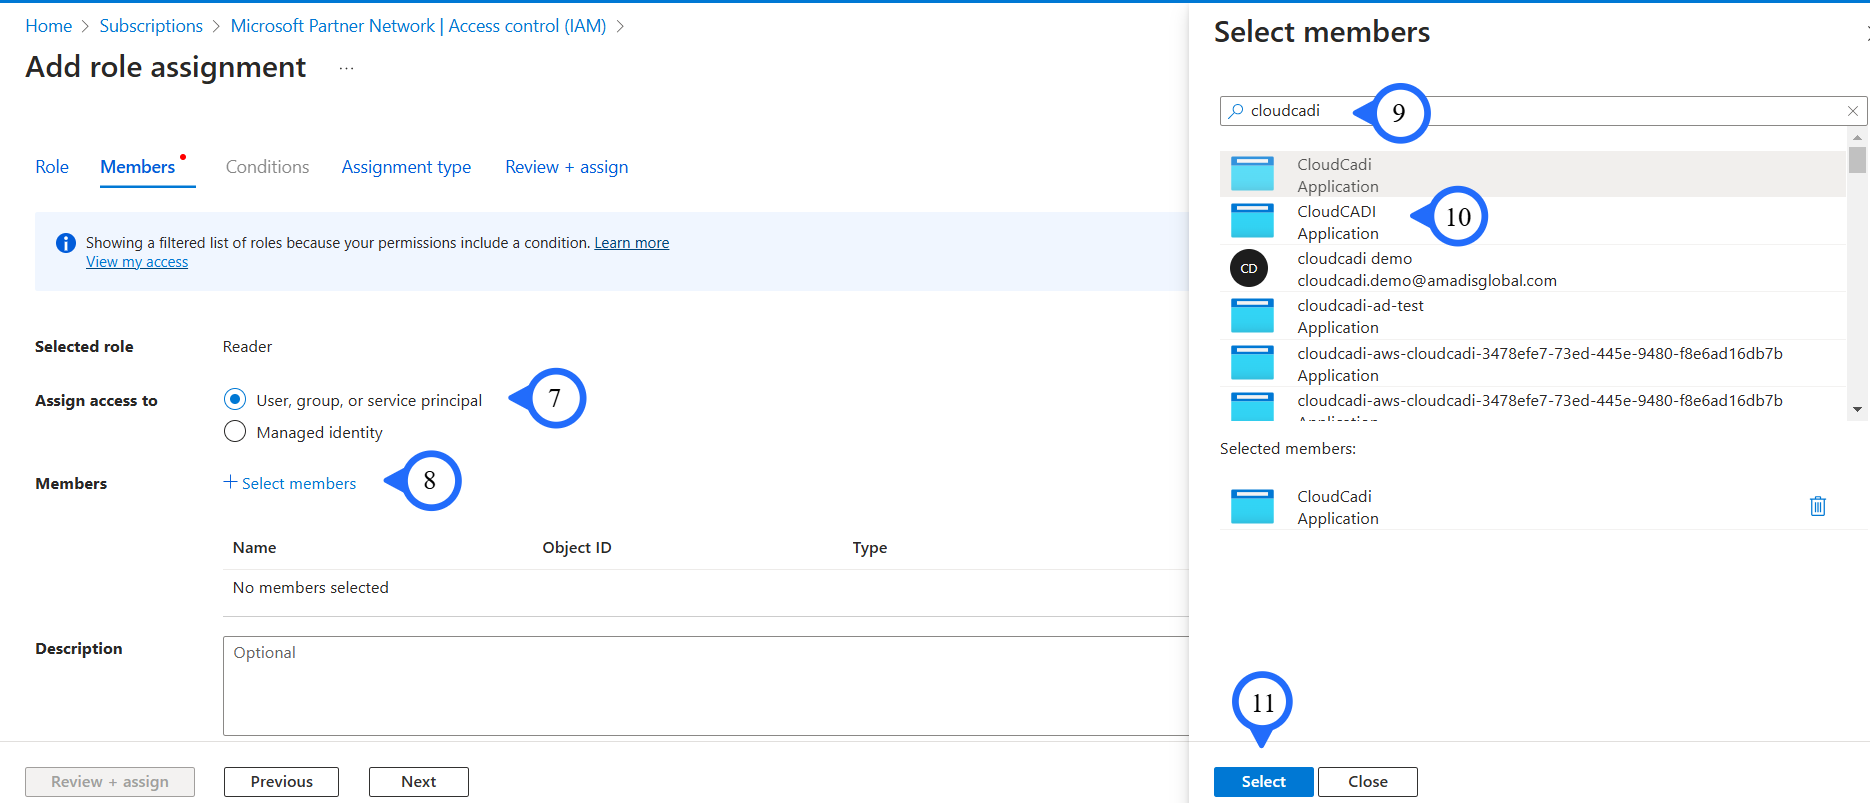
Step 7: Select Assign access as "User, group, or service principal".
-
Step 8: Click "+ Select Members".
-
Step 9 & 10 & 11: Choose the Service principal that is created during the managed app creation process and click on "Next"
- Step 12: Click on the "Review + assign" button.